Minting atomicassets NFTs
After having created the structure of the collection, it is time to start operating with the NFTs. To do so, the atomicassets smart contract offers us these actions:
- mintasset: mint a new NFT.
- transfer: Send one or more NFTs from one account to another.
- burnasset: Destroy (burn) the NFT.
- setassetdata: Set or modify the mutable data of an NFT.
- backasset: Associate tokens to the NFT that will be released when the NFT is destroyed.
Minting NFTs
Minting NFTs consists of creating instances from a reference template, which contains the information that will be replicated in each new instance, as we have already seen in previous documents.
The parameters of the action would be the following:
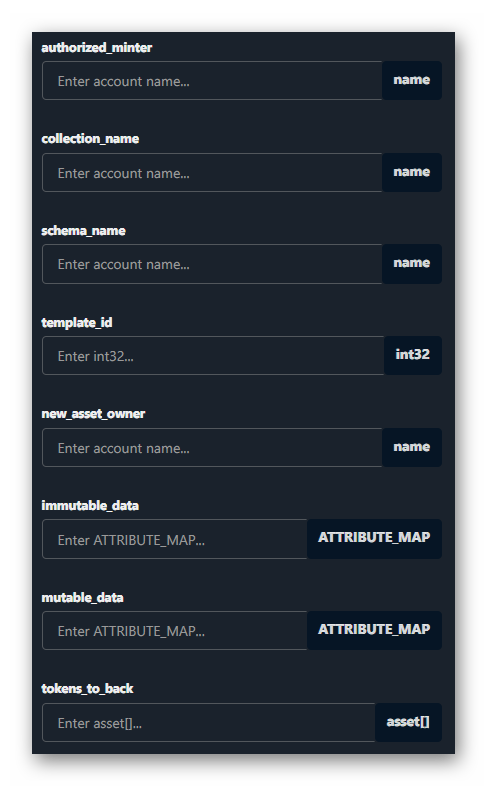
- authorised_minter: Account authorised by the collection.
- collection_name: Name of the collection to which the NFT will belong.
- schema_name: Name of the schema in which the data types that will define the NFTs are declared.
- template_id: Identifier of the template that contains all the immutable data of each copy of NFT that will be minted with this template.
- new_asset_owner: Account name that will receive ownership of the newly created NFT. The authorised account can create an NFT directly in a target account other than its own without the need for transfers.
- immutable_data: Additional immutable data. This data is not in the template, but its types must be defined in the schema.
- mutable_data: Initial mutable data. Mutable data are not defined in the template, but their types must be defined in the schema. Mutable data can be added or modified in the NFT at any time, so it is not mandatory to create it at this point.
- tokens_to_back: List of tokens that will be associated to the NFT from the moment of its creation and that will be released when the NFT is destroyed.
Immutable_data and mutable_data are defined as objects of type ATTRIBUTE_MAP, already seen in previous documents.
We can consult the "config" table of the smart contract atomicassets to check which tokens are currently allowed to be associated with NFTs as not all of them are allowed.
AtomicAsssets config](/img/tutorials/howto_atomicassets/atomicassets_supportedtokens.png)
If you need to associate other types of tokens to an NFT, or even other NFTs, you can use third-party utilities, such as Blenderizer V.2 :::
Next we are going to create a "Player" NFT from the template we created in the previous document. In the schema declaration we include several fields that were not used by the template; points, life and shield, because this data will change over time, so it will be mutable data.
Let's look at the preparation of the data to create the NFT:
const authorized_minter = 'arpegiator21';
const collection_name = 'arpecol11111';
const schema_name = 'player';
const template_id = 447413;
const new_asset_owner = 'arpegiator21';
const immutable_data = [];
const mutable_data = [
    {
        key: "points",
        value: ["uint32", 0],
    },
    {
        key: "life",
        value: ["uint16", 100],
    },
    {
        key: "shield",
        value: ["uint16", 20],
    }
];
const tokens_to_back = [];

(async () => {
    const result = await mintAsset(
        authorized_minter,
        collection_name,
        schema_name,
        template_id,
        new_asset_owner,
        immutable_data,
        mutable_data,
        tokens_to_back
    );
    console.log(result);
})();
And call to action:
/**
 * Mint new asset
 */
const mintAsset = async (
  authorized_minter,
  collection_name,
  schema_name,
  template_id,
  new_asset_owner,
  immutable_data,
  mutable_data,
  tokens_to_back
) => {
  try {
    const result = await apiRpc.transact(
      {
        actions: [
          {
            account: "atomicassets",
            name: "mintasset",
            authorization: [
              {
                actor: authorized_minter,
                permission: "active",
              },
            ],
            data: {
              authorized_minter: authorized_minter,
              collection_name: collection_name,
              schema_name: schema_name,
              template_id: template_id,
              new_asset_owner: new_asset_owner,
              immutable_data: immutable_data,
              mutable_data: mutable_data,
              tokens_to_back: tokens_to_back
            },
          },
        ],
      }, TAPOS
    );
    return result;
  } catch (error) {
    console.log(error);
  }
}
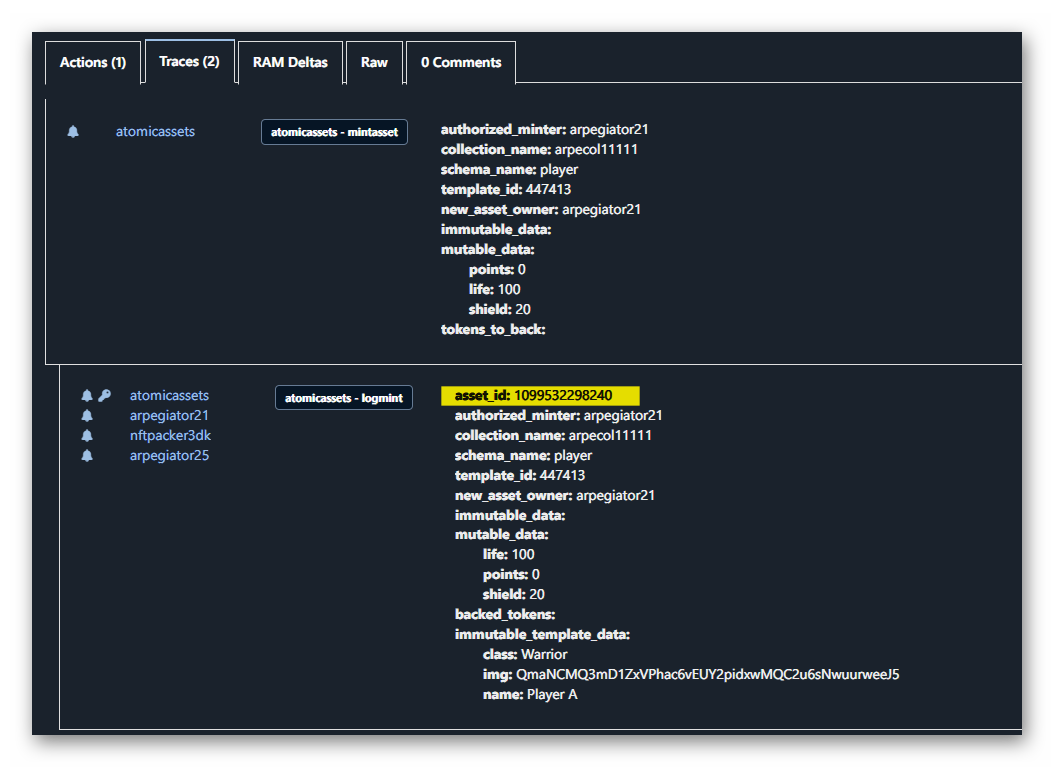
Again, if we trace the ID of the transaction performed, we can get the ID of the new NFT
And if we go to an NFT browser, like the AtomicHub marketplace, we can see our NFT.
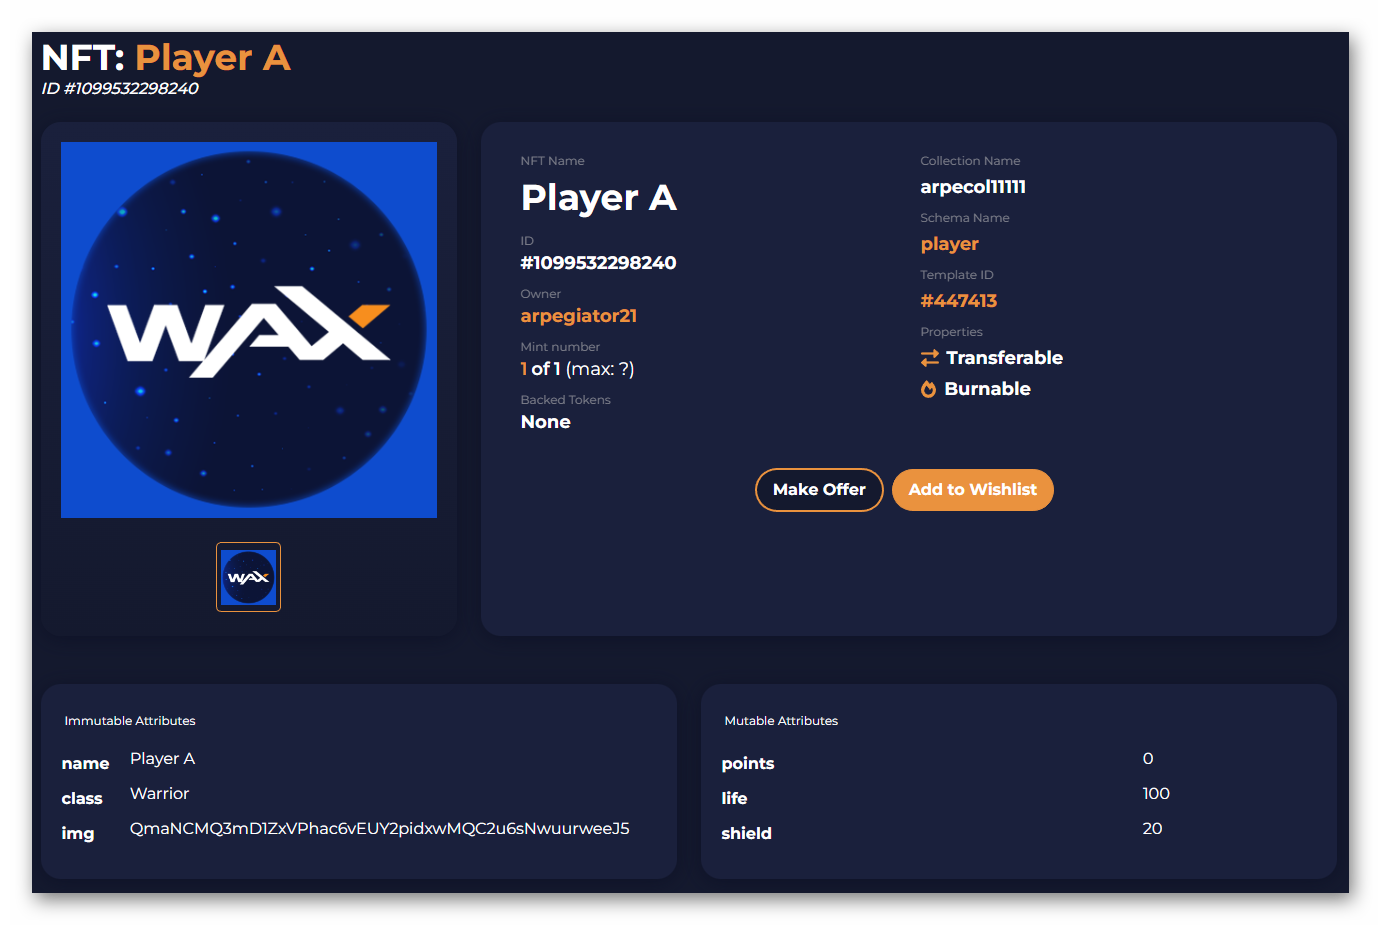
What does the NFT we have created look like?
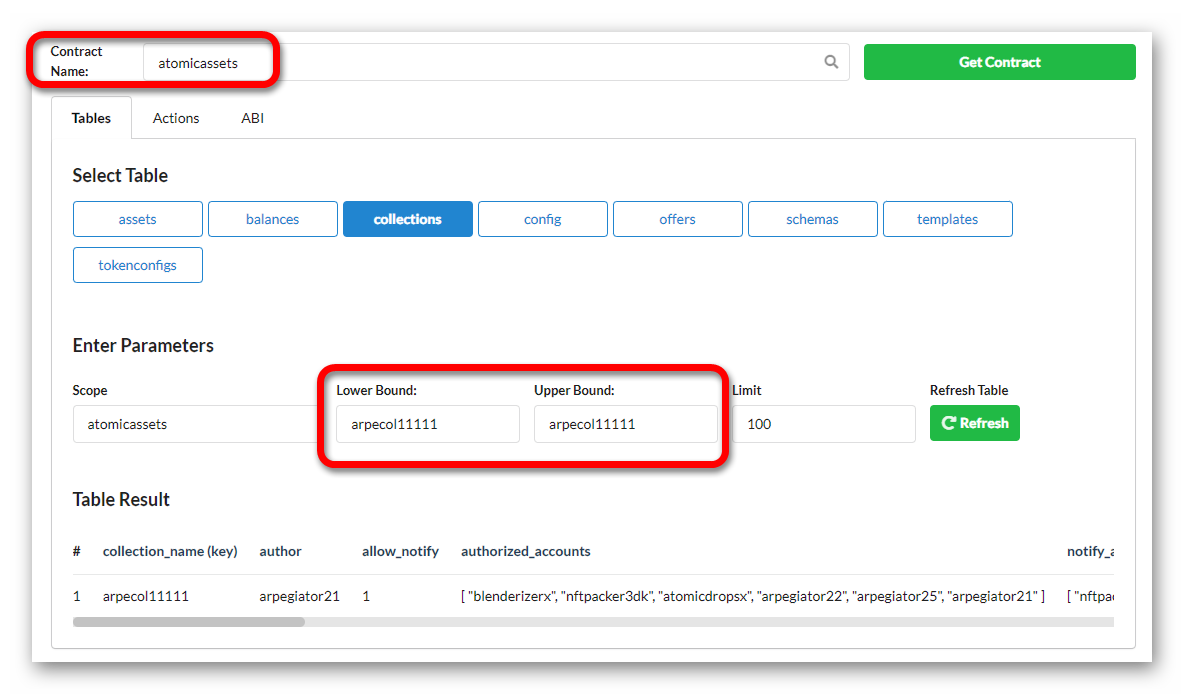
We can access the collections table of the smart contract atomicassets to check it (enter the collection name in the search filter):
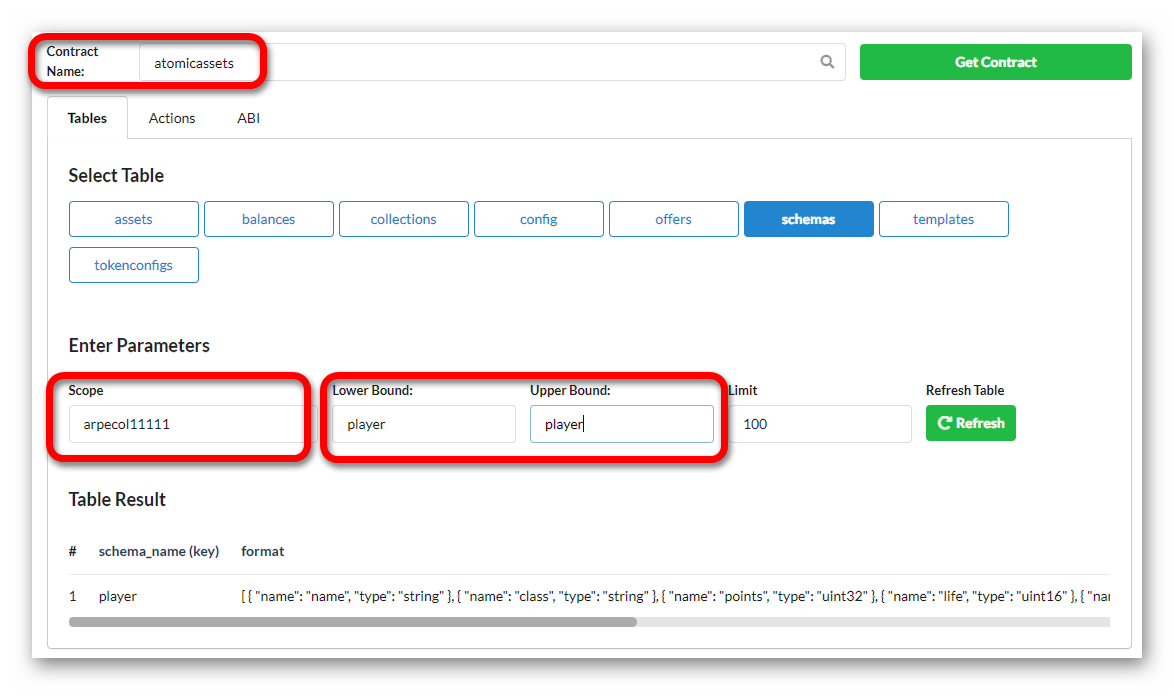
We can also access the schema table to see the schema we have created (this time we will use the name of the collection to set the scope of the search):
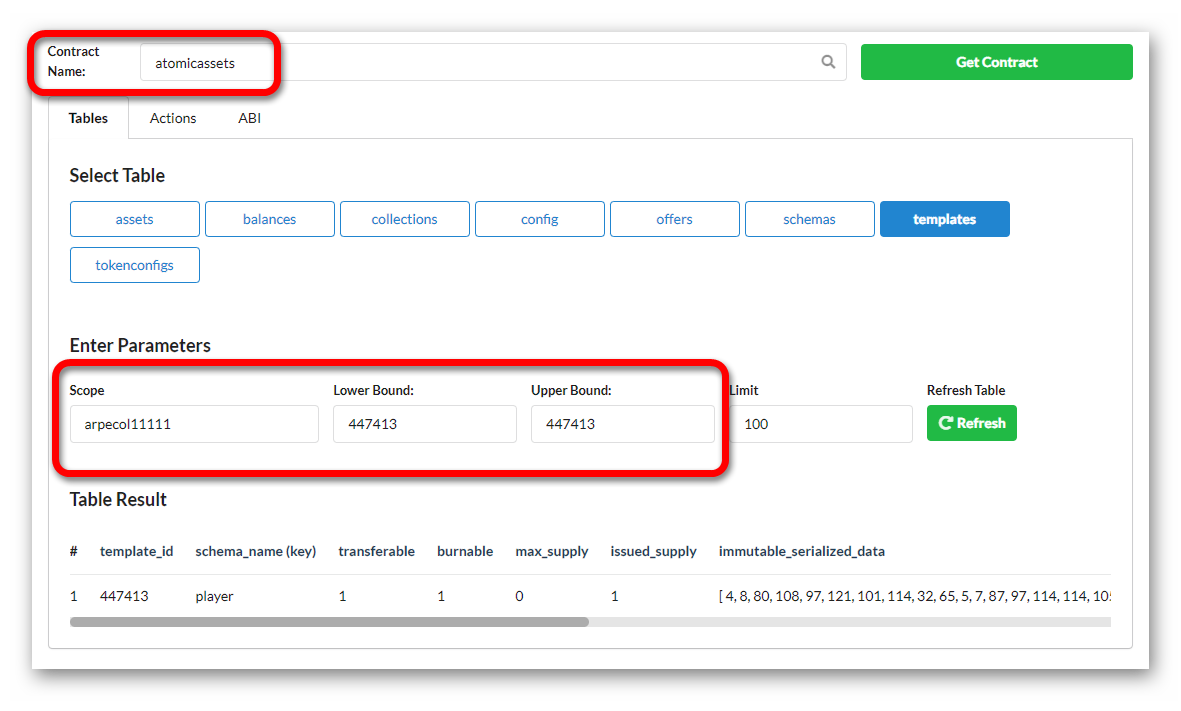
We can see the structure of the template by consulting the table "templates".
By consulting the "asset" table and filtering by owner name and NFT ID, we obtain the data of the NFT itself.
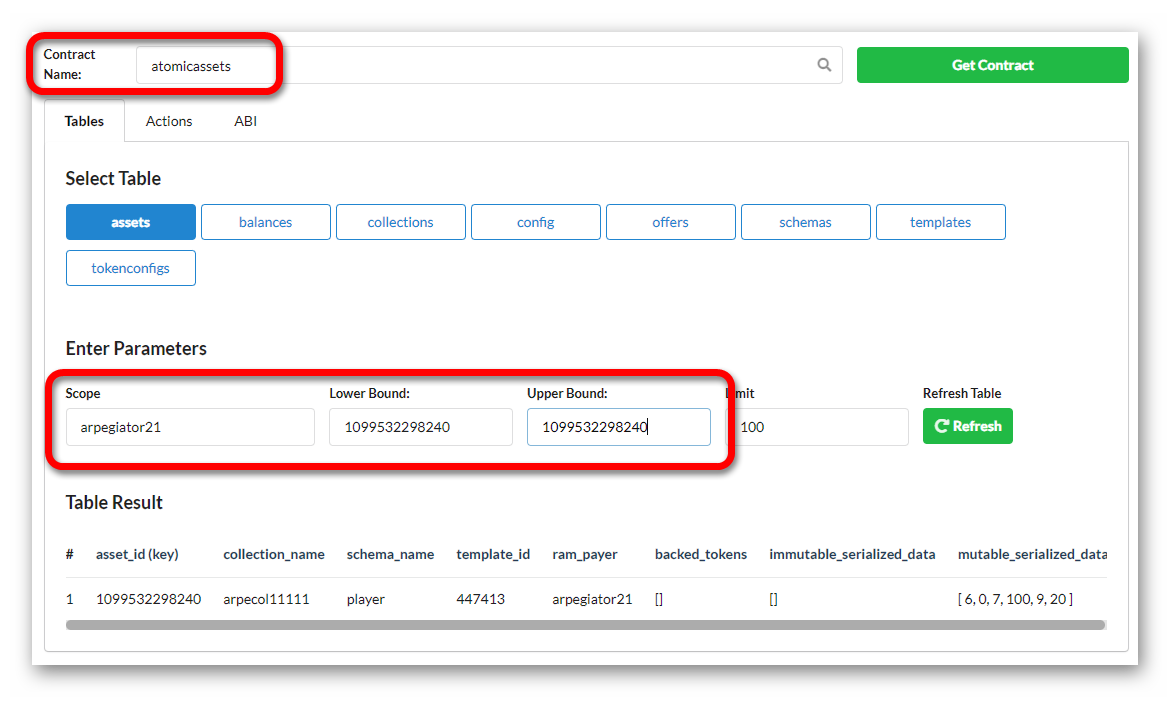
If you look, some of the information is serialised to save RAM, which makes it difficult to verify the information in the tables. Pink Network has developed an API service to facilitate queries to the NFT database. Some WAX guilds offer redundant replicas of this service for easy access and availability. If we make use of one of those APIs, for example, the one maintained by 3DK Render on testnet, the guild that shares this tutorial, to access the NFT information we can get something like this (depending on the NFT created in our exercise):
Request URL (for the NFT with the ID 1099532298240):
https://testatomic.3dkrender.com/atomicassets/v1/1099532298240
Outcome of the request:
{
  "success": true,
  "data": {
    "contract": "atomicassets",
    "asset_id": "1099532298240",
    "owner": "arpegiator21",
    "is_transferable": true,
    "is_burnable": true,
    "collection": {
      "collection_name": "arpecol11111",
      "name": "My Great Collection",
      "img": "QmRVwNbe8wZyjeV37igQsuEfMktJvRv2hkSHqyaaLmfFSi",
      "author": "arpegiator21",
      "allow_notify": true,
      "authorized_accounts": [
        "blenderizerx",
        "nftpacker3dk",
        "atomicdropsx",
        "arpegiator22",
        "arpegiator25",
        "arpegiator21"
      ],
      "notify_accounts": ["nftpacker3dk", "arpegiator25"],
      "market_fee": 0.08,
      "created_at_block": "146914266",
      "created_at_time": "1649330195000"
    },
    "schema": {
      "schema_name": "player",
      "format": [
        {
          "name": "name",
          "type": "string"
        },
        {
          "name": "class",
          "type": "string"
        },
        {
          "name": "points",
          "type": "uint32"
        },
        {
          "name": "life",
          "type": "uint16"
        },
        {
          "name": "lifepoints",
          "type": "uint16"
        },
        {
          "name": "shield",
          "type": "uint16"
        },
        {
          "name": "shieldpoints",
          "type": "uint16"
        },
        {
          "name": "img",
          "type": "ipfs"
        }
      ],
      "created_at_block": "153820765",
      "created_at_time": "1652784024500"
    },
    "template": {
      "template_id": "447413",
      "max_supply": "0",
      "is_transferable": true,
      "is_burnable": true,
      "issued_supply": "1",
      "immutable_data": {
        "img": "QmaNCMQ3mD1ZxVPhac6vEUY2pidxwMQC2u6sNwuurweeJ5",
        "name": "Player A",
        "class": "Warrior"
      },
      "created_at_time": "1653761028000",
      "created_at_block": "155774695"
    },
    "mutable_data": {
      "life": 100,
      "points": 0,
      "shield": 20
    },
    "immutable_data": {},
    "template_mint": "1",
    "backed_tokens": [],
    "burned_by_account": null,
    "burned_at_block": null,
    "burned_at_time": null,
    "updated_at_block": "155774752",
    "updated_at_time": "1653761056500",
    "transferred_at_block": "155774752",
    "transferred_at_time": "1653761056500",
    "minted_at_block": "155774752",
    "minted_at_time": "1653761056500",
    "data": {
      "life": 100,
      "points": 0,
      "shield": 20,
      "img": "QmaNCMQ3mD1ZxVPhac6vEUY2pidxwMQC2u6sNwuurweeJ5",
      "name": "Player A",
      "class": "Warrior"
    },
    "name": "Player A"
  },
  "query_time": 1654083999042
}
As we have already seen, the information about the collection is defined in a record in the collections table, the information that will be repeated in the copies of the same type of NFT is defined in the template and the type of data it can hold is defined in the schema. By not having to repeat all this information in each copy of the NFT, RAM is saved.