Custom Permissions
Why custom permissions?
Having more than the standard “active” and “owner” keys linked to your account gives you the possibility to assign certain permissions to specific keys. This can be useful for many scenarios, but in use-case in particular single permission keys come in handy: When working with scripts.
Let’s say you are running a cronjob on your server, that claims your rewards on a daily basis. Letting that script sign transactions with your normal active or even owner key would result in a huge security threat. Whoever gets hold of that script, could modify it to additionally sign other transactions, such as updating your account details or unregging your producer.
Instead, if you use a custom permission key for that script, the script will only be limited to that specific action the key is entitled to execute, regardless if the script was modified or the key was stolen.
How can I create custom permissions?
The most user-friendly way to create custom keys is by using bloks.io. In the following few steps, we will cover how to create custom permission keys using bloks.io.
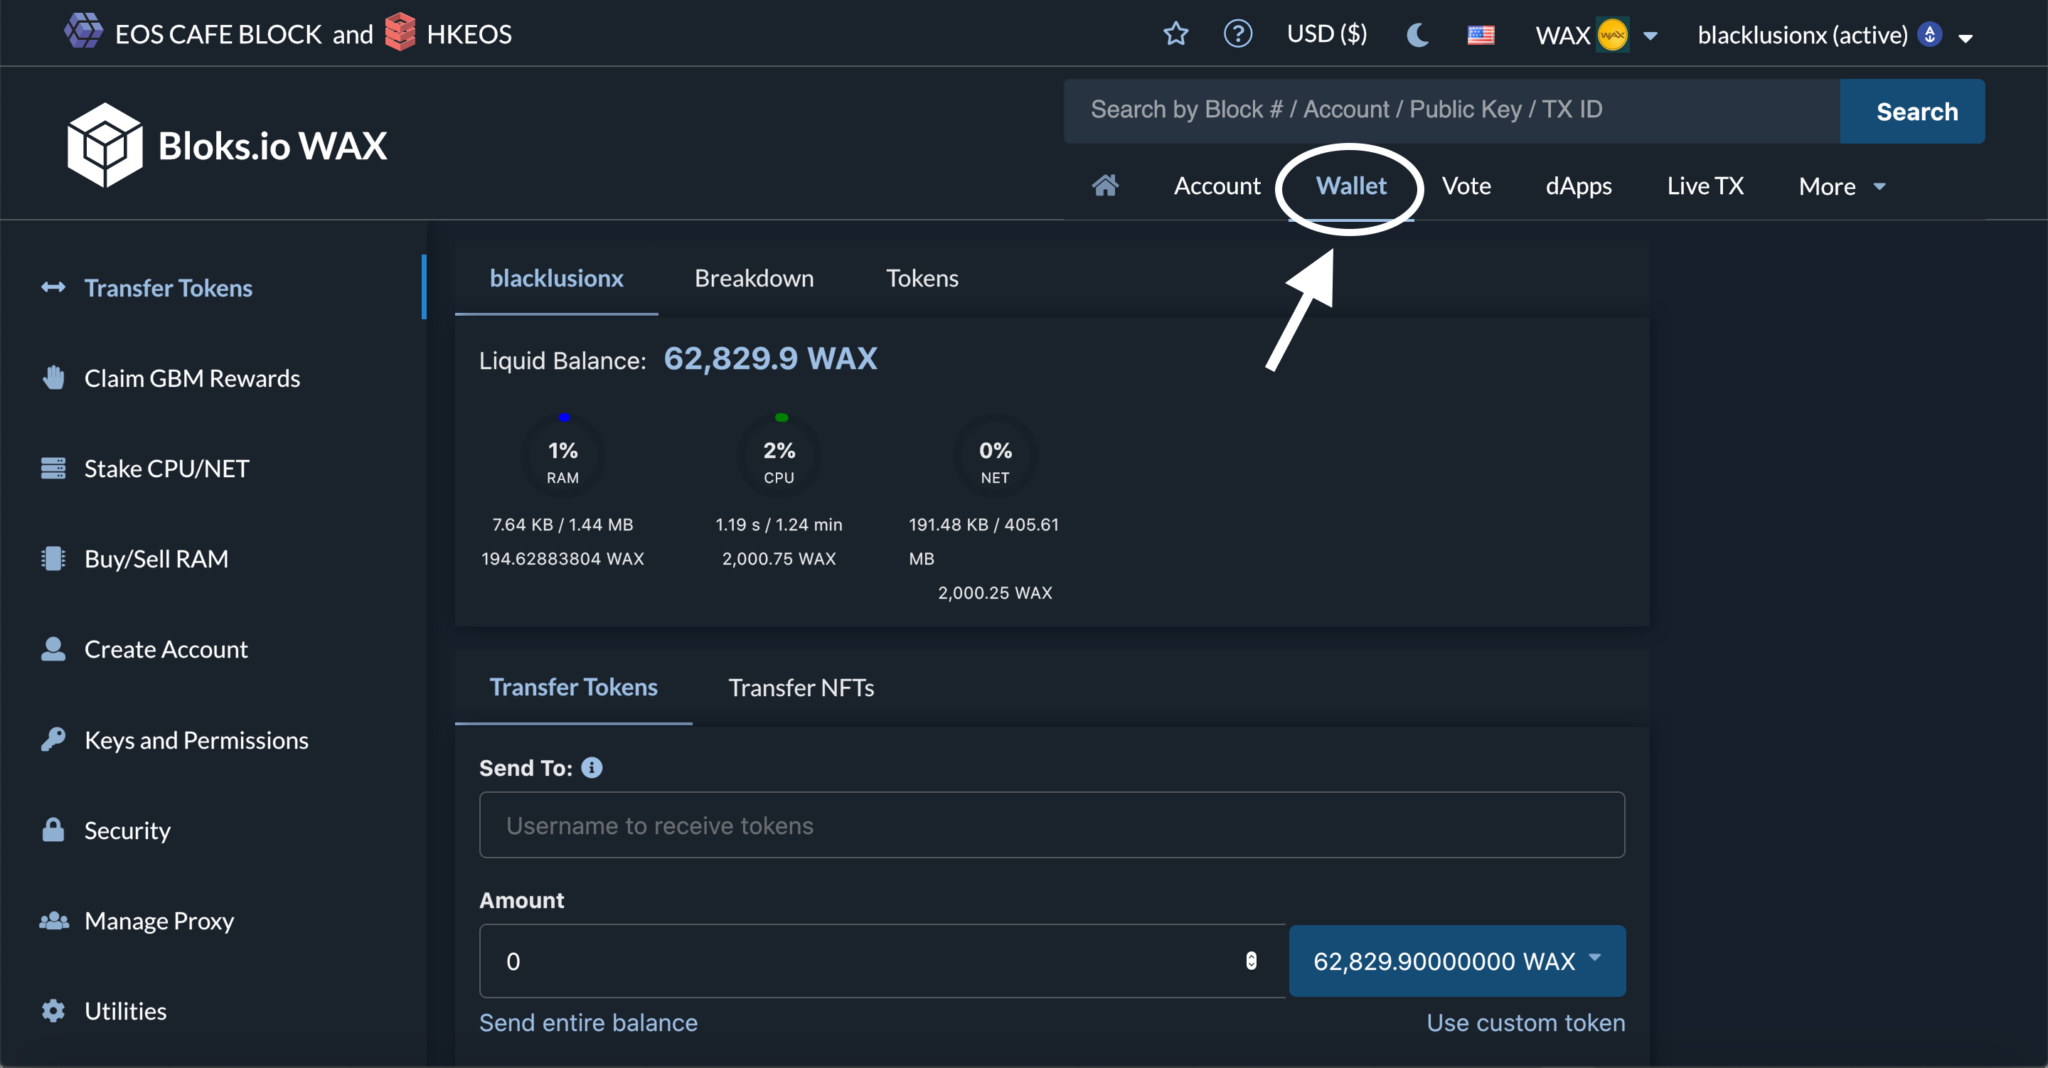
Step 1: Navigate to the wallet section of your account
Make sure that you are logged in. It will be sufficient if you are logged in with your “active” key.
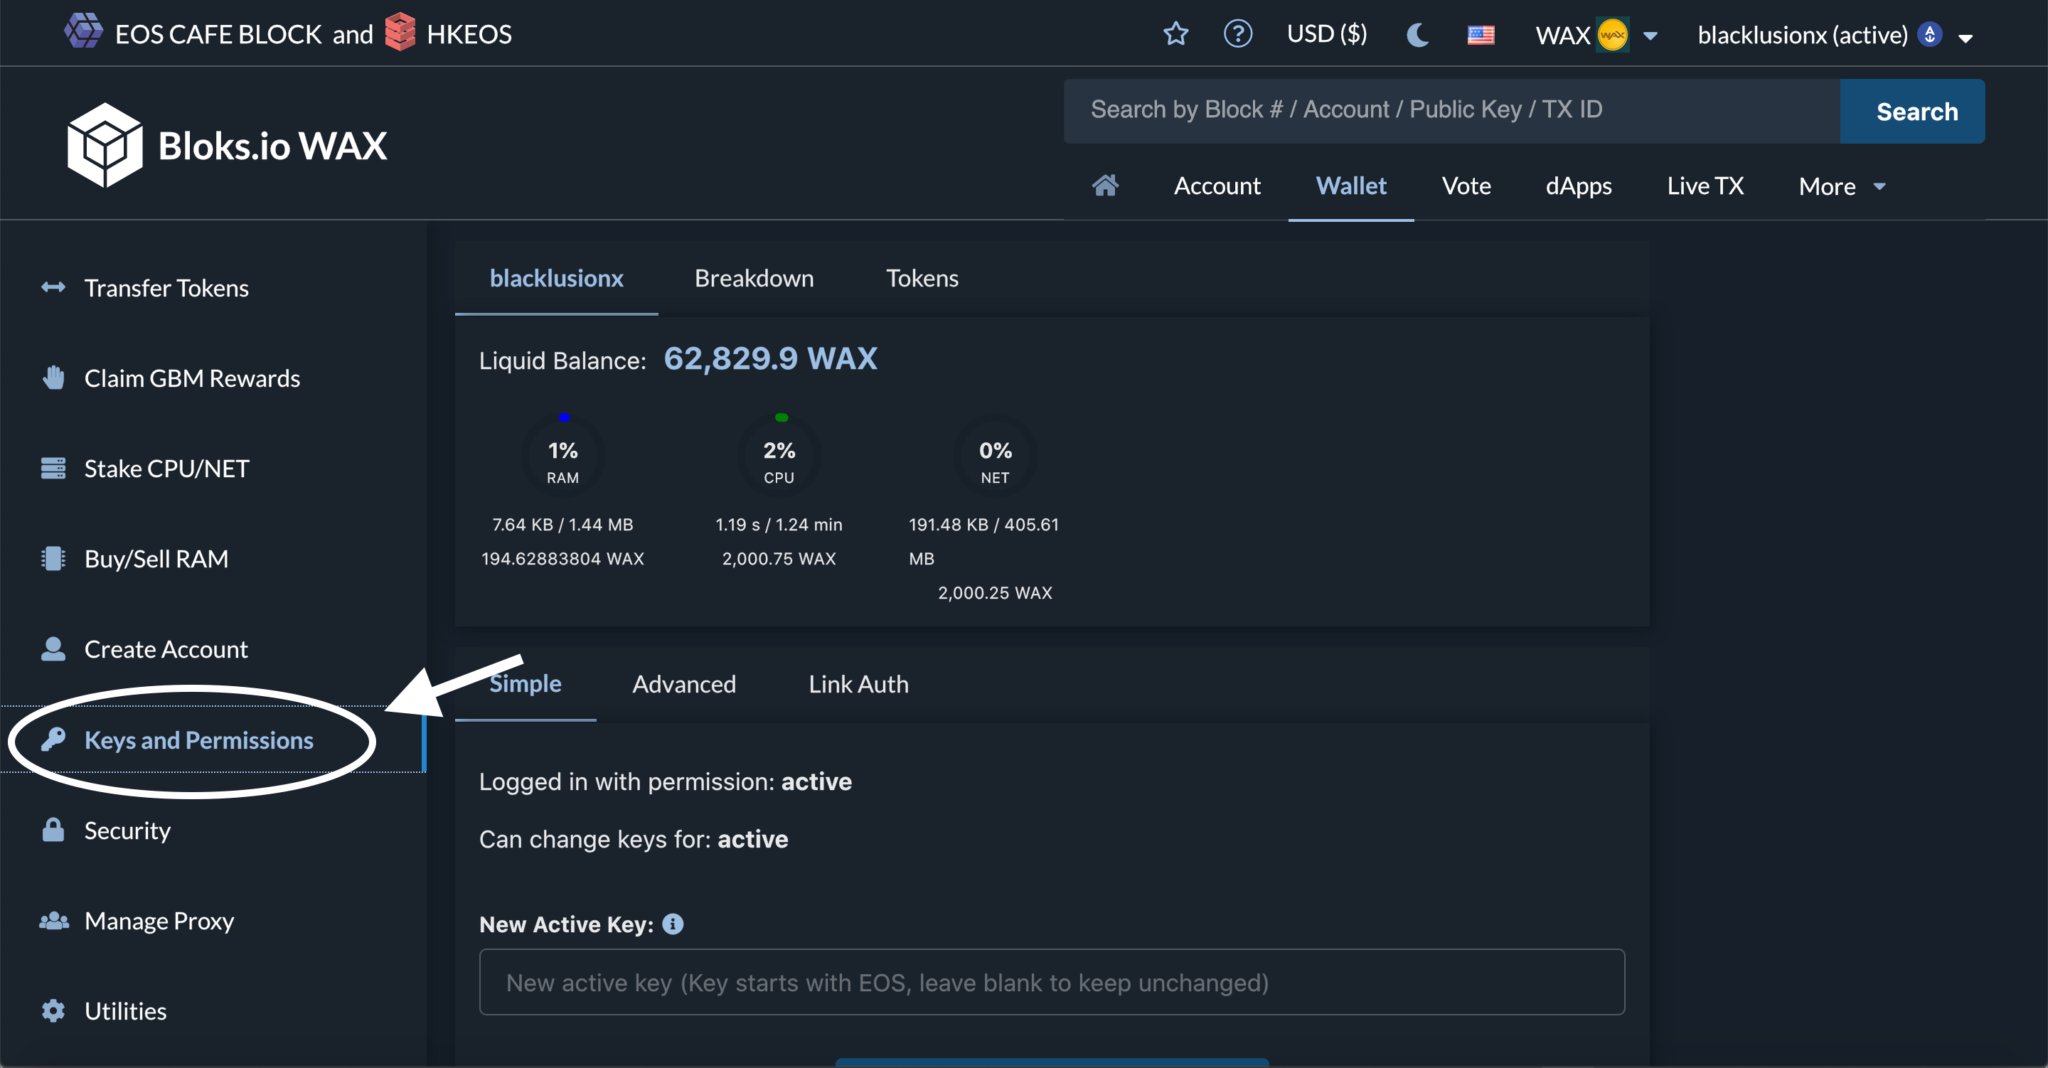
Step 2: Navigate to Keys and Permissions
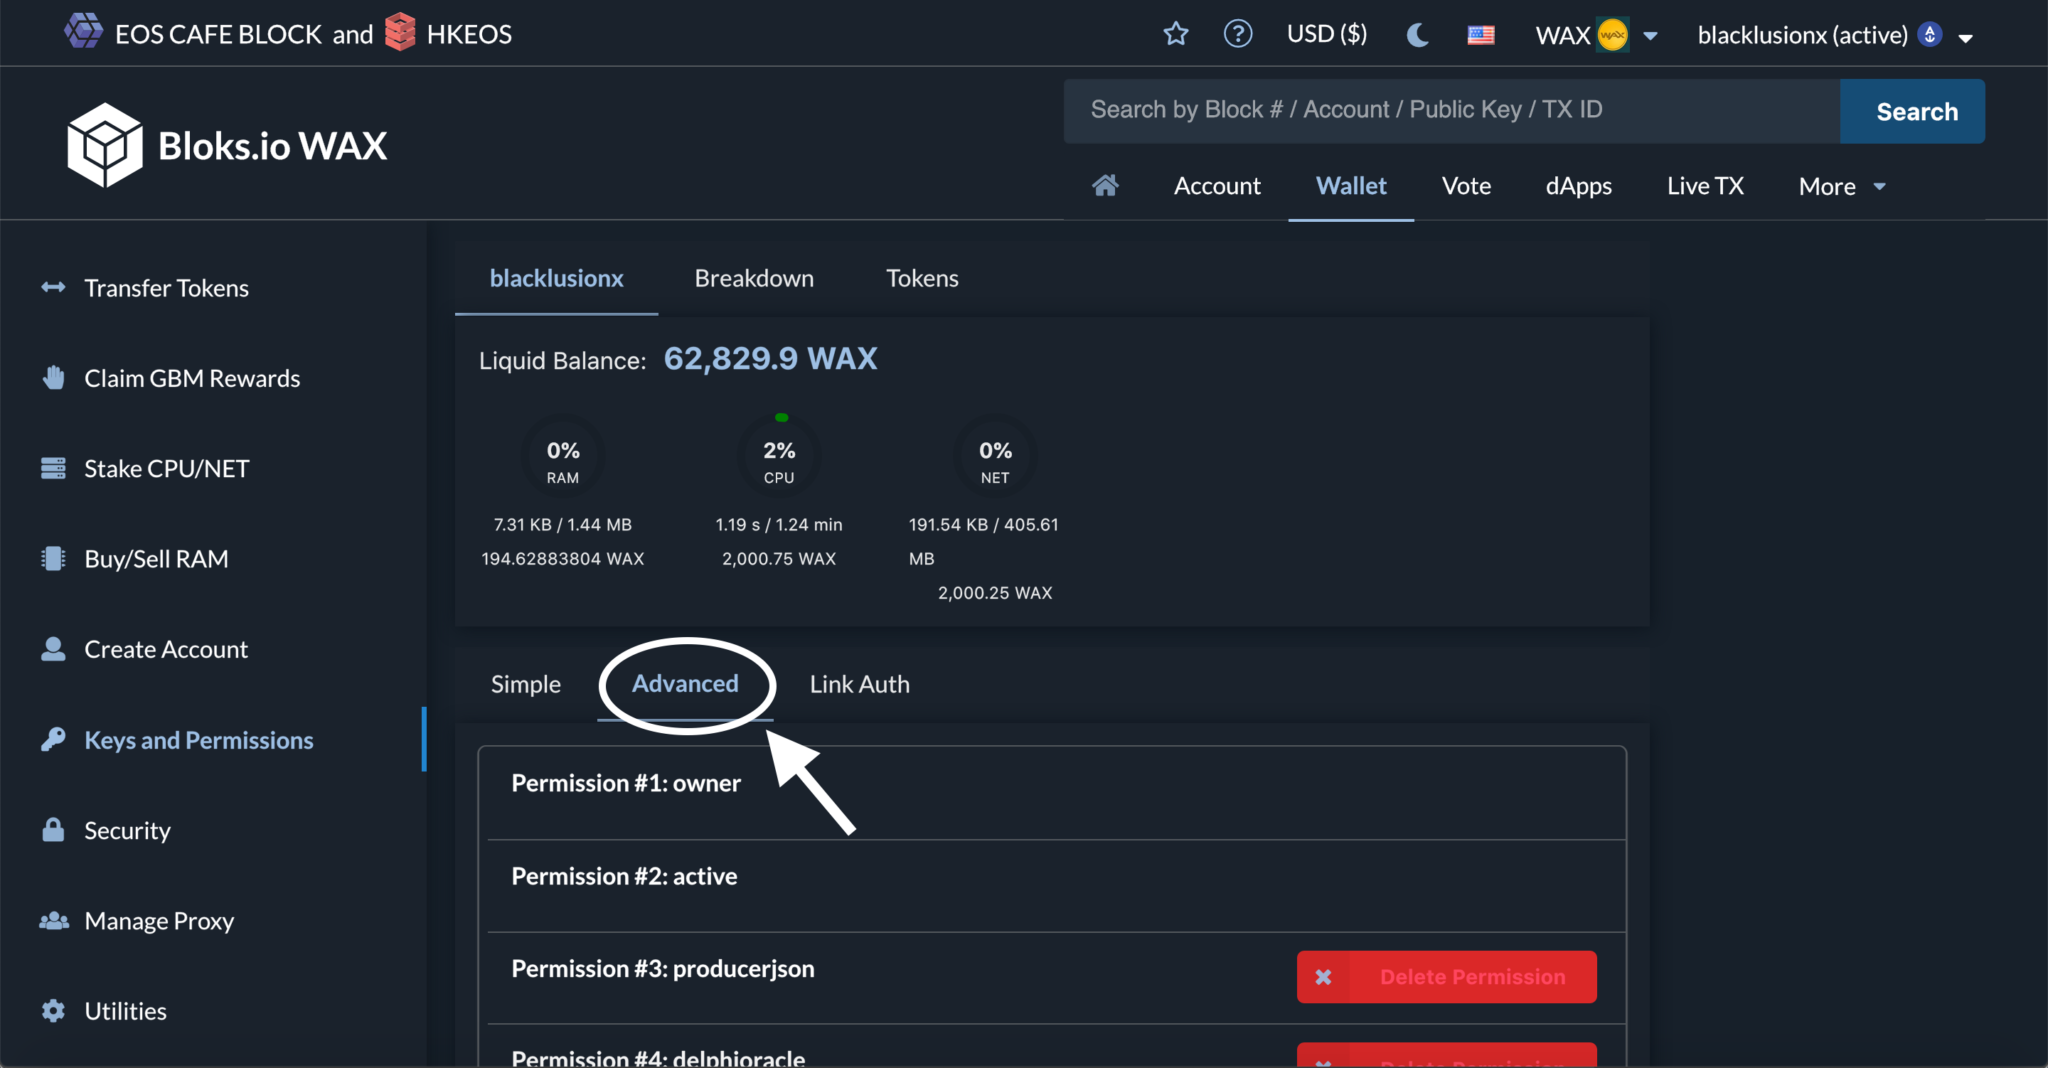
Step 3: Navigate to Advanced
Step 4: Creating a new Permission
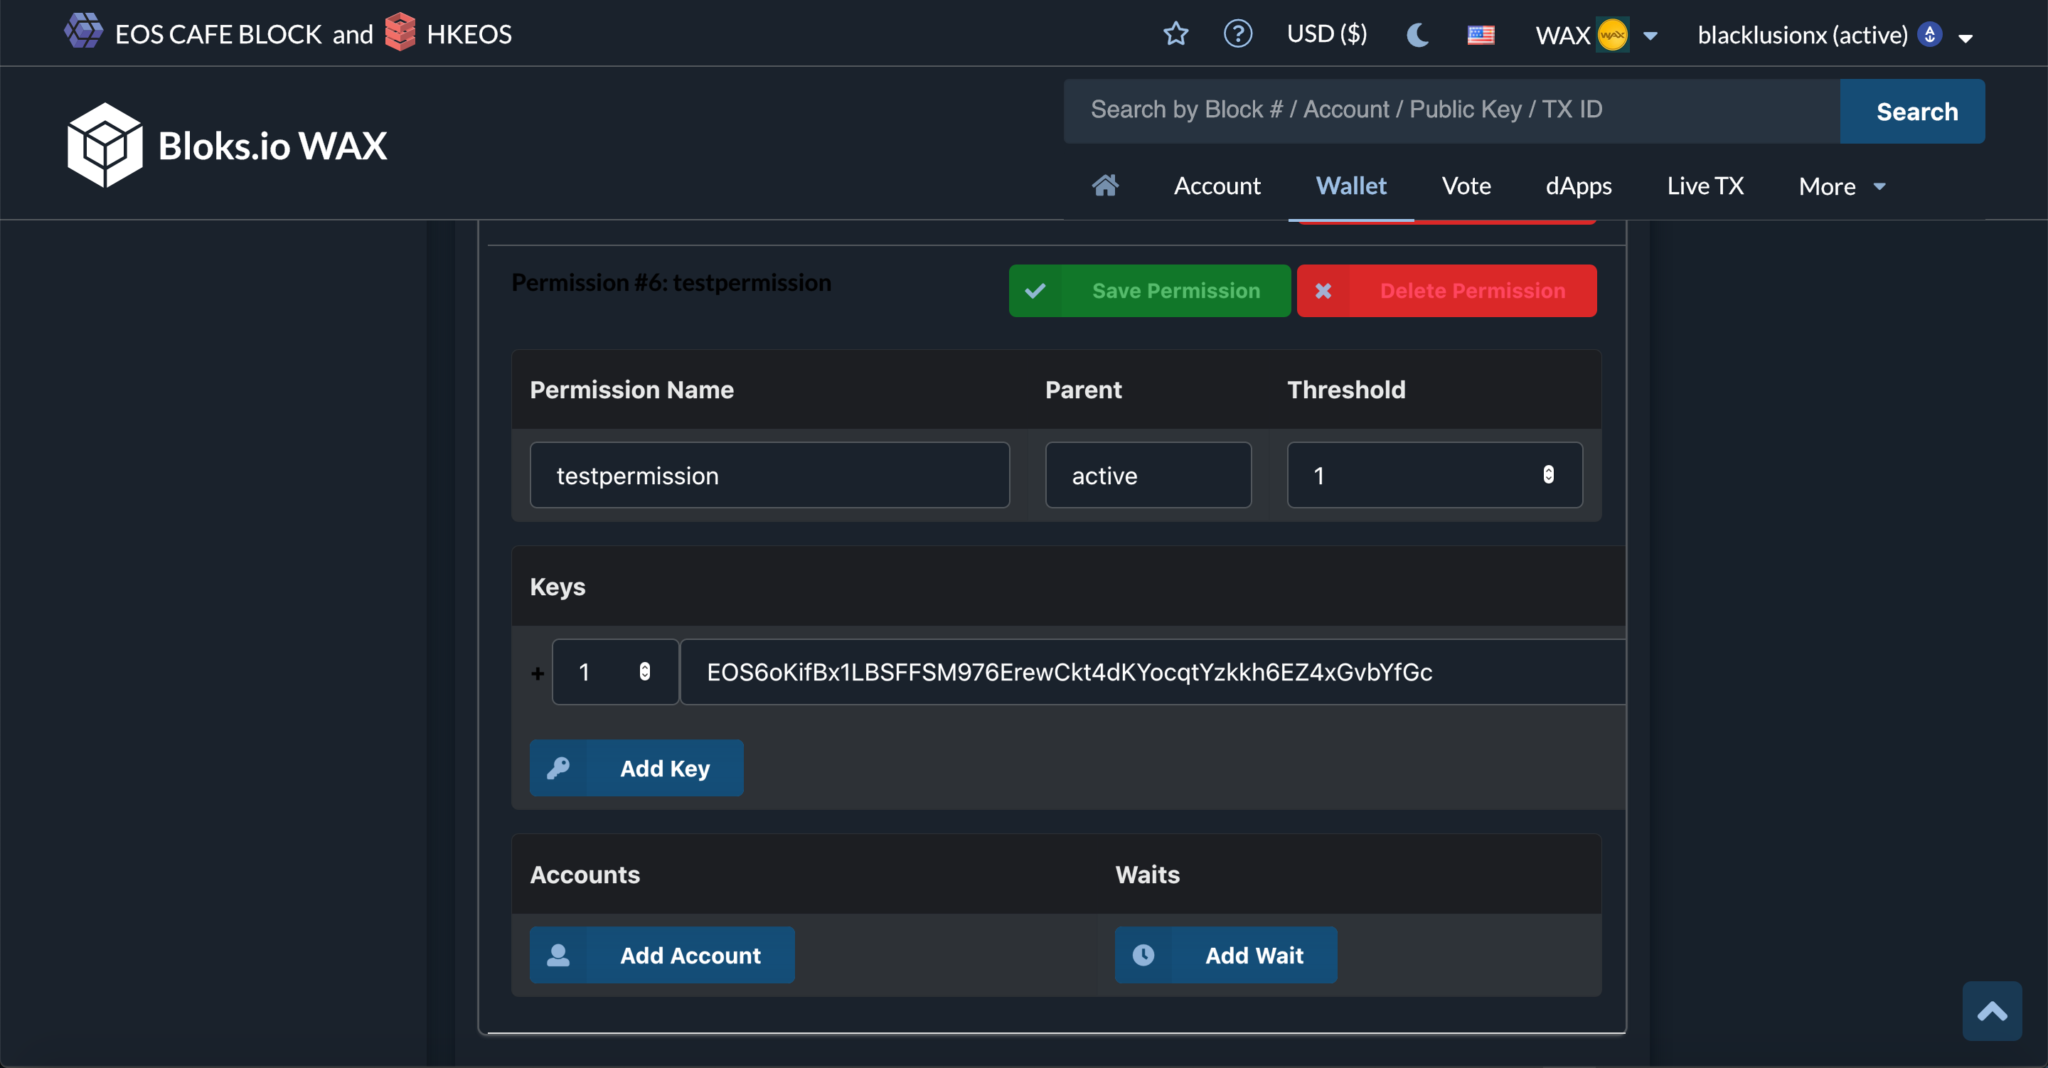
Click on “Add New Permission”: Type in the name of the permission you would like to create. The name is completely up to you. However, we would recommend something meaningful and appropriate for the permission.
Parent: Most of the time this will be “active”. If you scroll down on bloks.io, you can see how the structure adapts, if you change the parent of the permission. Setting the parent to something other than “active” will allow for more complex permission structures.
Click on “Add Key”: Create a new private/public key with the generator of your choice (e.g. Anchor or Scatter Wallet) and paste the public key here. Note that there is a field to type in a number. This number determines the weight of the key and is used with the threshold feature.
Threshold: Each permission can be associated with multiple keys and/or accounts. A custom weight can be assigned to each of them, allowing for more fine-grained access control. When creating permissions for scripts, you will most likely not need this feature. However, it is a pretty cool feature. A possible scenario would be, to set the threshold to the number of team members of your guild, requiring every team member to sign the transaction rather than only one.
Account: If your aim is to add permission management to your scripts or cron-jobs, you will most likely not need this feature. Adding accounts instead of keys can be useful for managing permissions if there are multiple people accessing the account. Basically, you can enter an account name into the “actor” field and specify the needed permission that the account needs to sign the transaction with (e.g. “active”).
Don’t forget to click on “Save permission”. You will be prompted with a popup to sign the transaction.

Step 5: Assign Contract Action to the permission
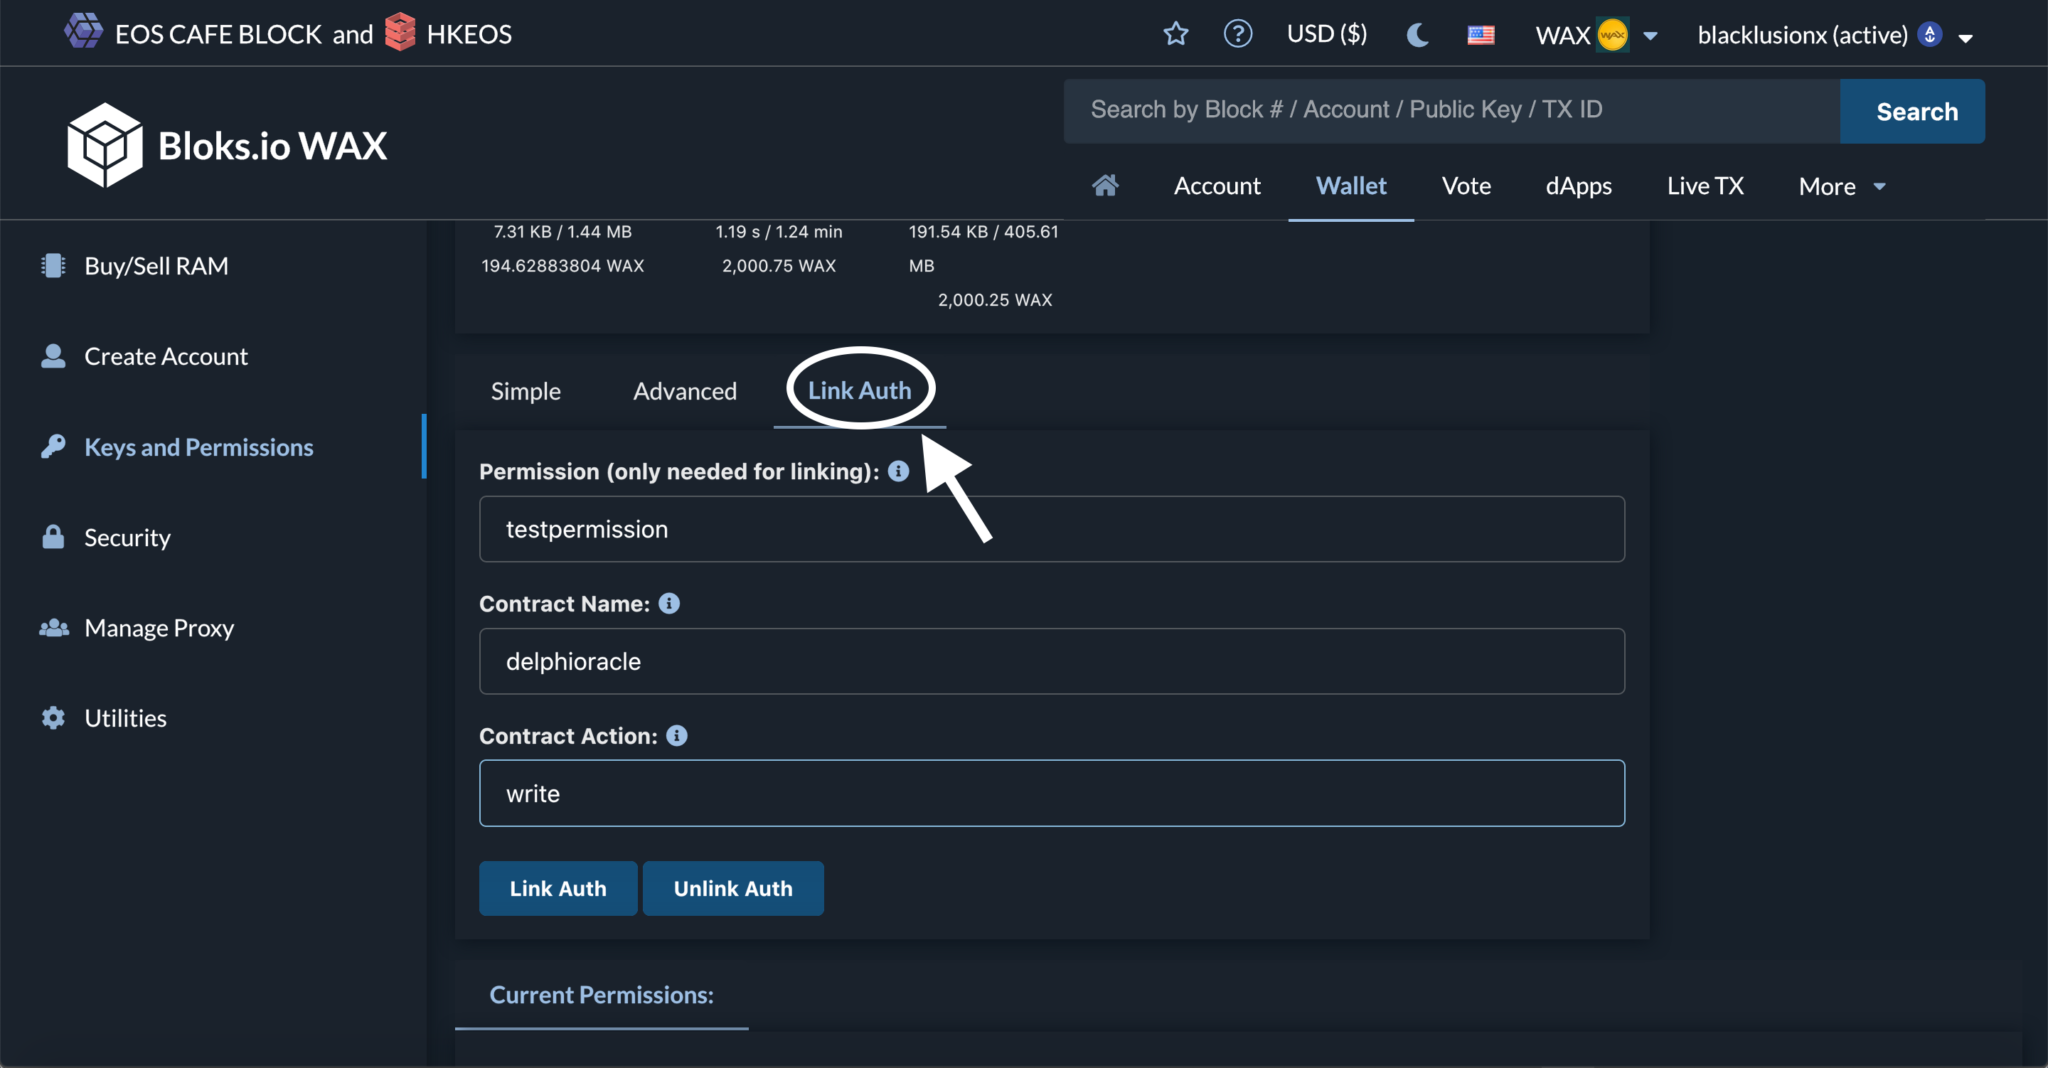
Navigate to “Link Auth”. Then enter the name of your previously created permission into the “Permission” field. Next you have to enter the name of the contract (e.g. “eosio”, “delphioracle” etc.).
Into the field “Contract Action” you will have to enter the name of the action you want to perform (e.g.”claimrewards”, “write”). If you scroll down, you will be able to see a preview of your permissions and contracts (however as of writing this article this feature was a bit laggy).
Click on “Link Auth“ and sign the transaction with the wallet of your choice.
Note that you may have to repeat this step if your task requires multiple actions (e.g. “producerjson::set” and “producerjson::del”.
Helpful Links
- Create custom permissions with GUI: https://wax.bloks.io